Shed Window Renovation (Phase one of outdoor space)
Fall is right around the corner, and I want to transform some of our outdoor spaces before fall comes. I love the fall season and I expect our family is going to be spending a lot of time outside and that is why I want to first focus on this area by the shed because its a great place for a little seating area. To start out this outdoor renovation, I wanted to first tear down the lean-to that was leaning against the shed shown in the image below and then put in a window where the window cavity is on the shed. It was a lot of work but a ton of fun! I will be showing you the steps I took to do this.
Tearing Down the Lean-to
A lot of people thought I was crazy for taking down this lean-to, but I knew my vision for this space and it was not to keep the lean-to. It was blocking half of the window and a good chunk of space I could use for a seating area. So my first step in this project was to take this lean-to shed down, which took awhile, but I did it!
Paint
Next is paint! Paint makes a huge difference in a space, and I was not jiving with the yellow brick. So I decided that I was going to paint the brick on the outside a white color. I had made a dream board to help me visualize what I wanted for my shed, and painting the brick white helped my dream board come to life.
Window
After painting the shed, I then did the window. I am by no means a professional window installer and I had to watch a lot of different YouTube videos just so I could figure this out, but I did it! It was barely too small, but the trim will cover that up.
Arch
Then, I needed to trim out the arch… I have never done something like this… so trial and error was key! I measured as good as I could on parts of the window that don’t have curves such as the height, width, and depth. For the curves, I used this awesome curve tool from Amazon. It’s called a steel curve template.
My first cut was so close! I just needed to trim a little bit. Remeber, trail and error is key!
Next, I made a base for the curved part. I screwed the bottom of the base to the piece of wood that is secured to the window. I also used wood glue.
After that, I used PVC pipe to trim out the top. PVC bends, making it easier to trim out this arch.
Once I got it all trimmed, I then got this cute wood accent piece from Home Depot that I placed on the wood. I attached it with wood glue.
Painting Again
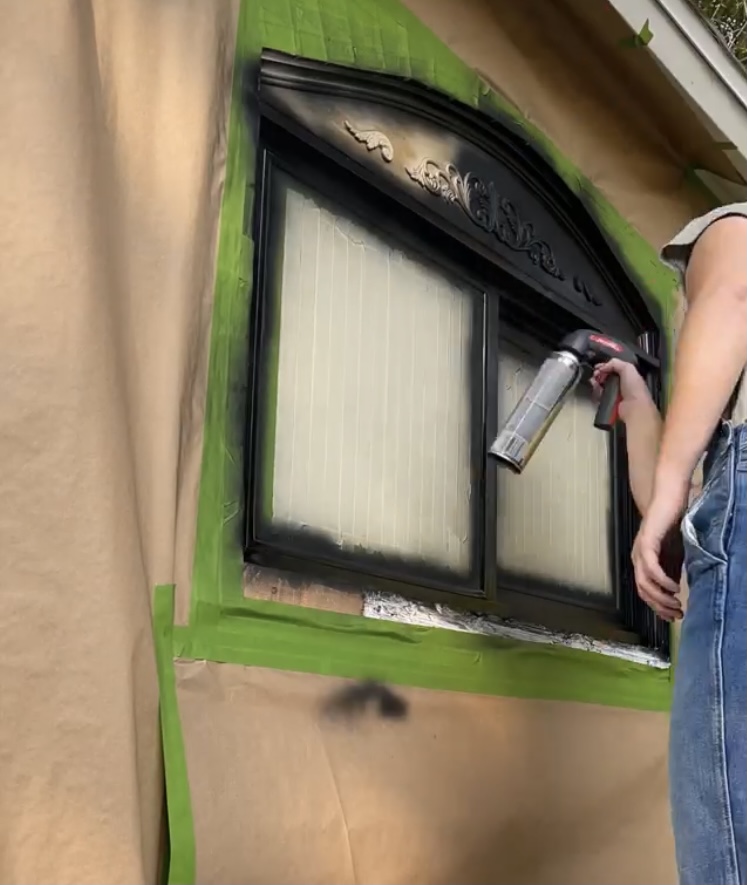
After that, I painted the window trim. When taping off to spray paint, it’s so hard to get the corners perfect. Don’t stress, just tape over it and razor blade it off.
I decided to paint it black! I got the handy handle for spray paint at Home Depot. It makes spraying so easy. After it dried, I used a satin clear enamel spray paint to protect it a little bit more.
Planter Box
Upon completing the window, I then decided to build a flower box. It was very simple. I used dog ear fence panels (cut off the top) that I sanded down. I used wood glue and brad nails to attach them together.
You are just making a box without the top. You can do this!! You also can just use a hammer and nails, or a drill and screws.
Shutters
I also made shutters, they are the easiest shutters you can use. I measured from the top of the window to the bottom and cut them that size. These are the 1X3 exterior fence pickets sanded down. I just cut three the same size and then cut two the horizontal size. I used wood glue and brad nails to put it together.
I stained the shutters and flower box. I first filled the holes with natural wood filler by DAP Products. I stained using Varathane Special Walnut.
Once the stain was dry, I attached the window box by screwing it into the wood that was under the window with 3 inch screws. If you have brick you can use masonry screws. I put the shutters up with masonry screws.
I saw a hack on Pinterest, where you put some real flowers with some fake flowers, so the flowers have more room to grow and it helps the fake ones look real.
That wraps it up for part one of our outdoor renovation. I am still kind of shocked that I installed a window and made it look like this! Try new things everyone! You can totally do it!!! Checkout our part two outdoor renovation where I created a beautiful gate to our secret garden.